How to disable WP-Cron and run It manually

Marc
Last Update 7 months ago
Disabling the default WordPress cron (WP-Cron) and setting up a server cron job can help improve your site's performance, especially if you have a high-traffic site.
Here’s a step-by-step guide on how to do it:
Disable WP-Cron
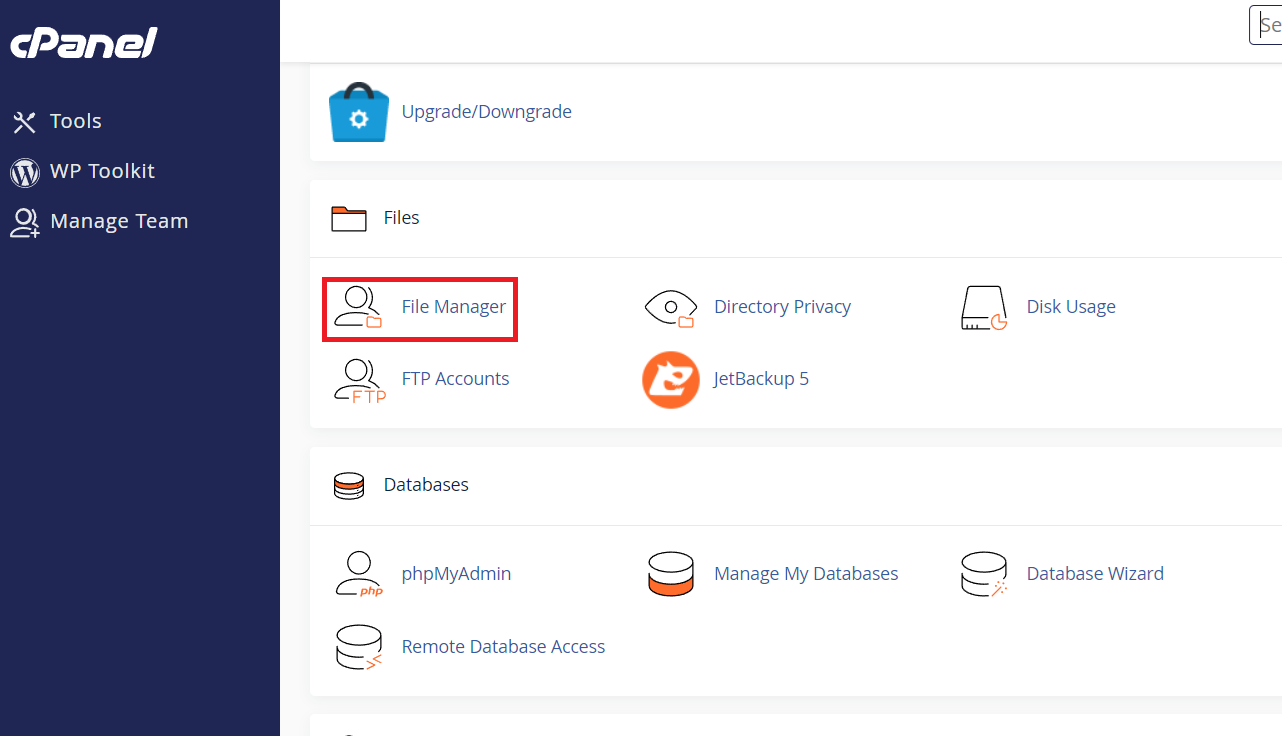
1. Access your WordPress installation directory by logging into your cPanel and navigating to the 'File Manager'.
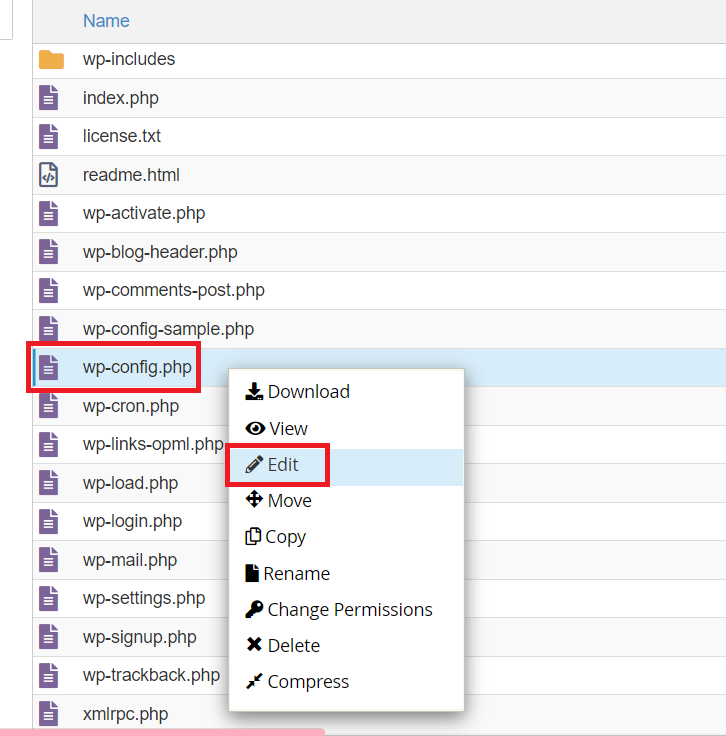
2. Locate and open the wp-config.php file in the directory where your WordPress installation is located.
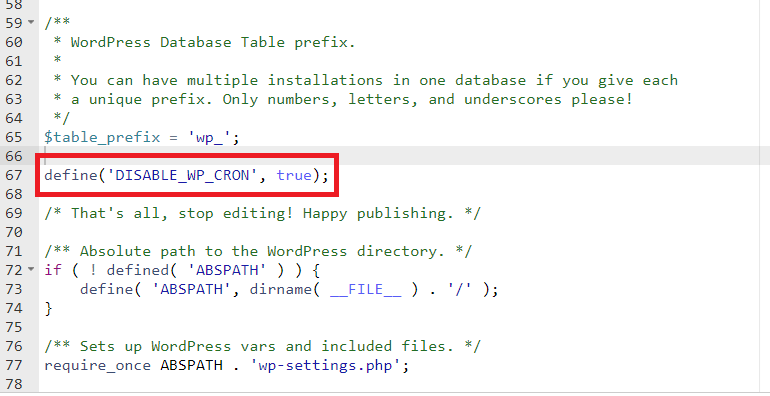
3. Add this line anywhere before the line that says /* That's all, stop editing! Happy blogging. */.
Set Up a Server Cron Job
Setting up a server-side cron job will allow WP-Cron to run at regular intervals without relying on website traffic.
1. Login to cPanel
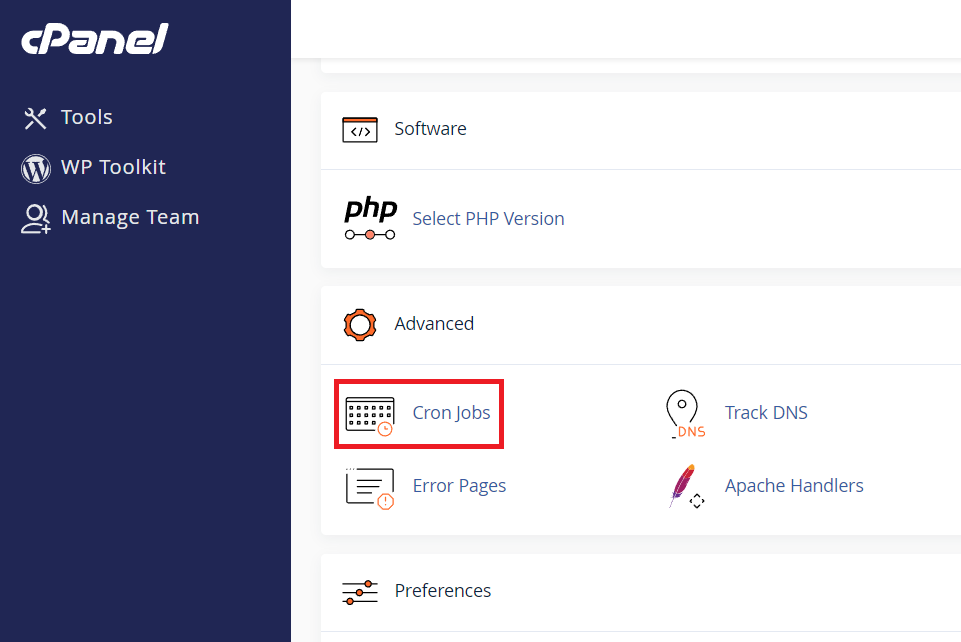
2. In the "Advanced" section, click on "Cron Jobs".
3. Add a New Cron Job:
Set the Schedule: Common Setting: Run every 5 minutes (adjust as needed).
- Minute: */5
- Hour: *
- Day: *
- Month: *
- Weekday: *
Command:
Note: Replace https://yourwebsite.com with your actual website URL.
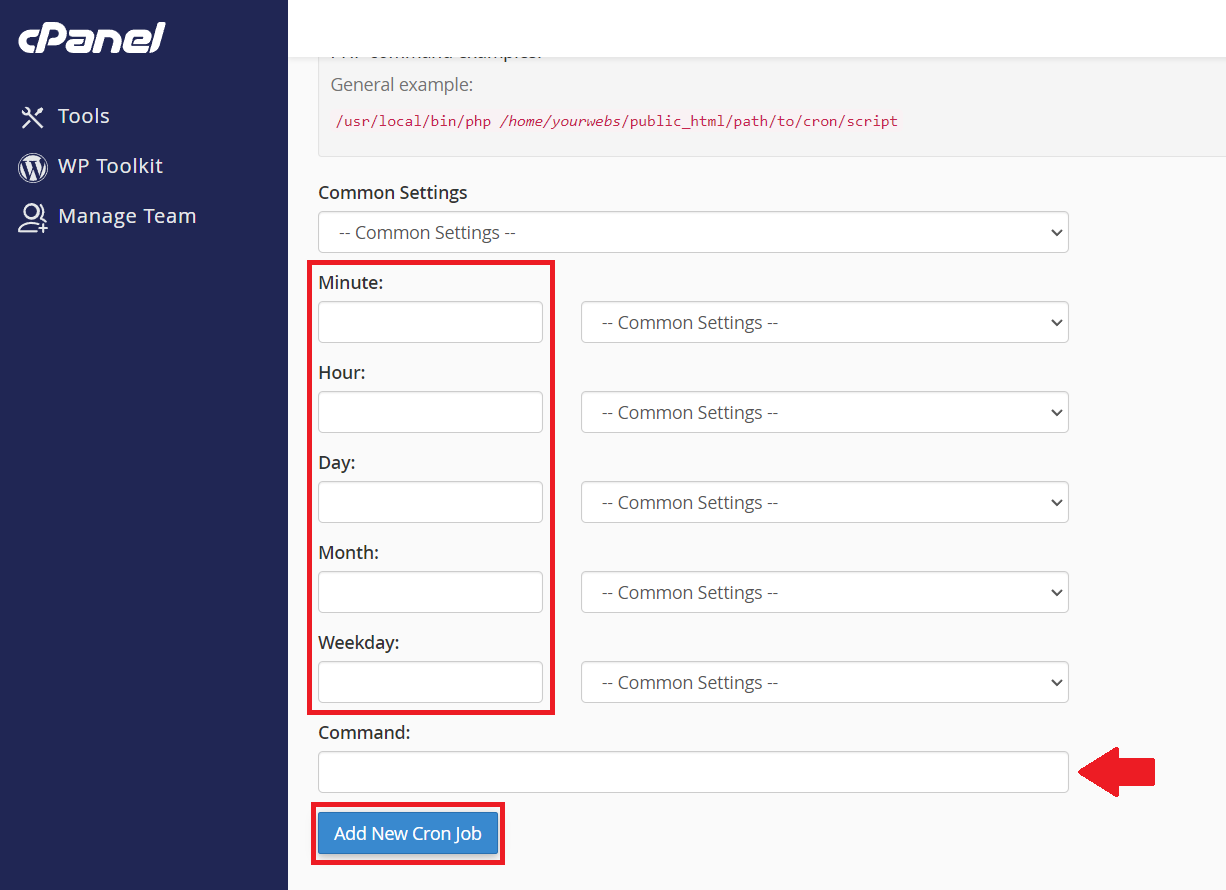
4. Click "Add New Cron Job".
This action saves the cron job settings and schedules it to run according to the specified interval. This ensures that the cron job will be executed regularly without needing further intervention, automating tasks such as scheduled backups, updates, or other automated processes on your server.