Adding a DMARC record to your DNS zone

Marc
Last Update a year ago
This topic covers processes relating to a cPanel service.
You'll need to be logged into the cPanel account to follow the steps.
DMARC (Domain-based Message Authentication, Reporting, and Conformance) is an email authentication and reporting protocol. In layman's terms, DMARC helps prevent email spoofing and phishing by allowing domain owners to specify how email messages from their domain should be handled.
Simple Scenario:
Imagine you own a house (your domain) and you want to make sure that anyone who receives mail claiming to be from your house actually is from your house. DMARC is like setting up a security system. You tell the mail carriers (email providers) how to verify if a mail item (email) is genuinely from your house (domain) or if it's a fake.
Adding DMARC to Zone Editor in cPanel:
1. Log in to your cPanel account.
2. Navigate to the 'Zone Editor' tool listed under the 'Domains' section (you can also search for 'zone' via the search bar in the top-right corner).

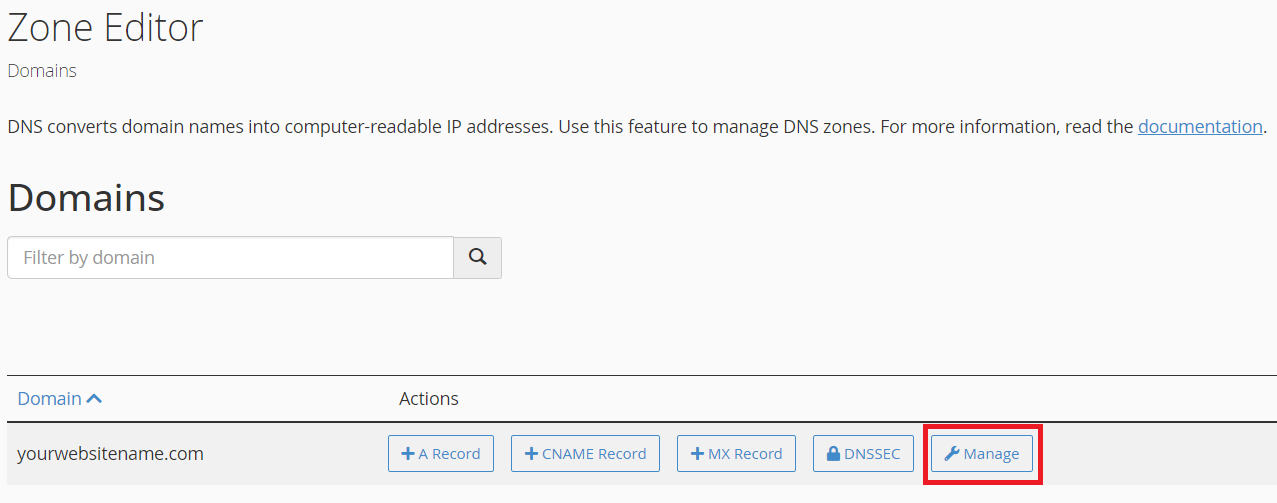
3. Next, locate the domain you want from the list and click the 'Manage' button.
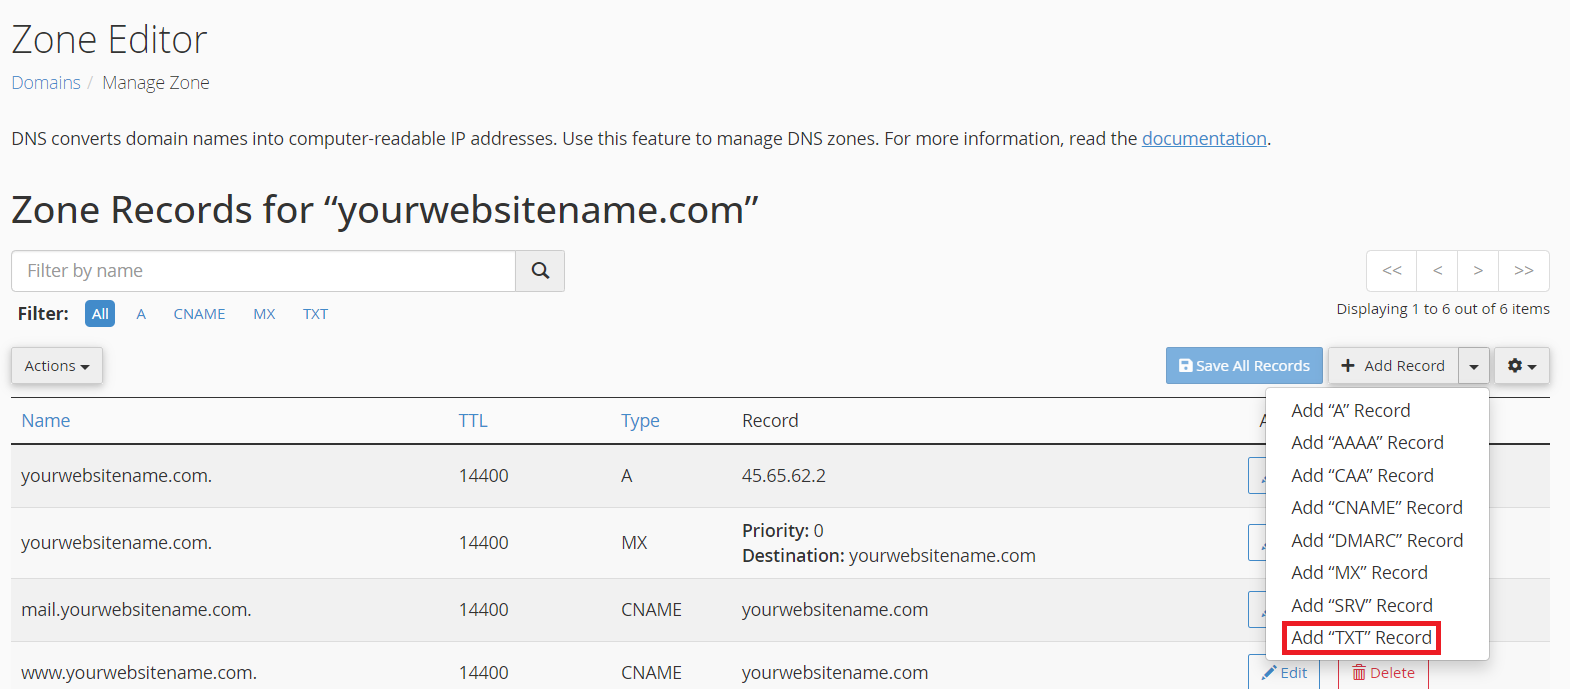
4. Click the small down arrow next to the 'Add Record' button.
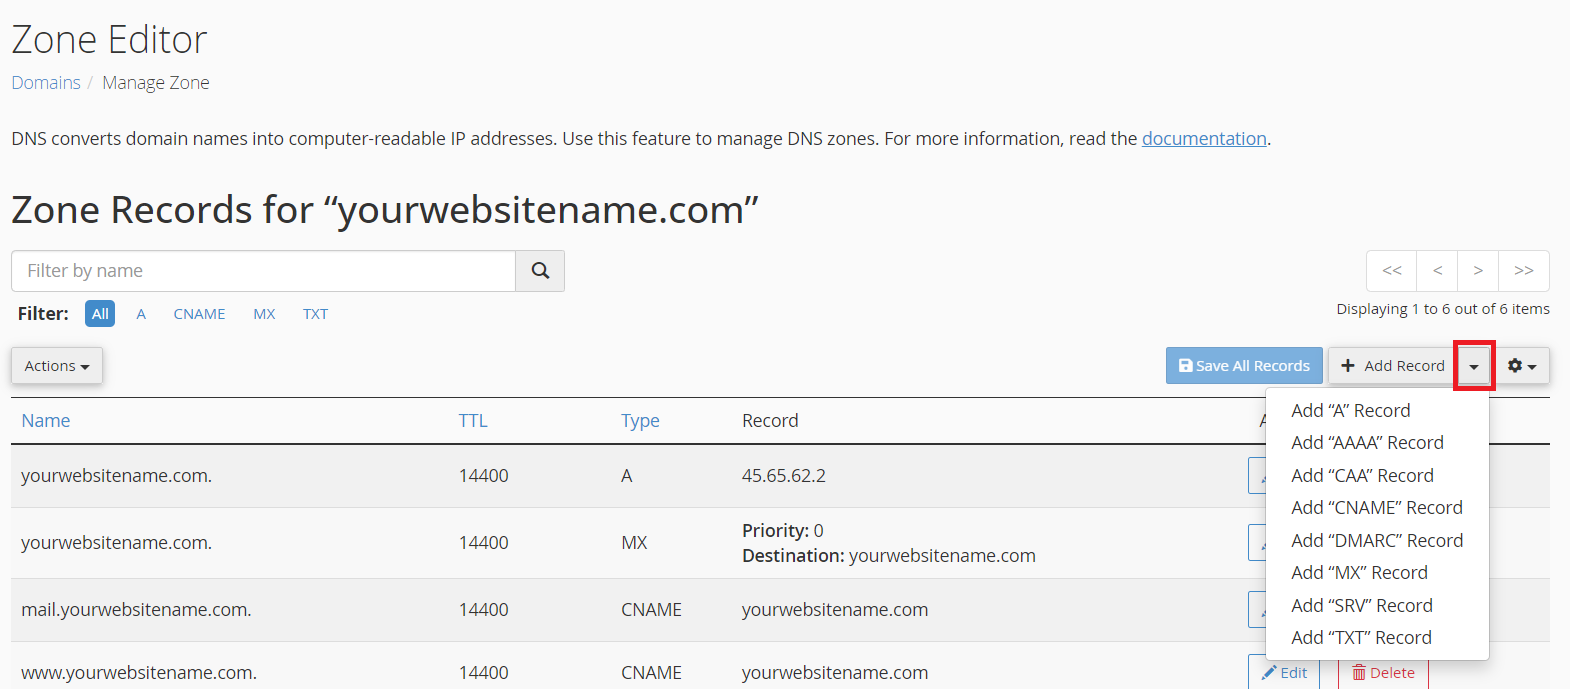
5. Choose 'Add TXT Record' from the list.
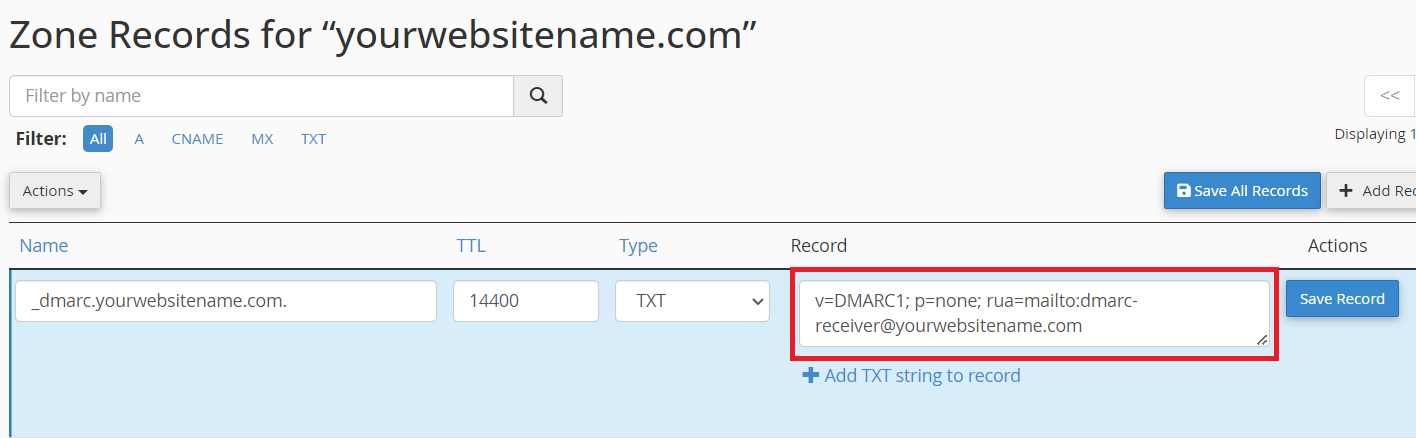
6. In the 'Name' column, enter _dmarc.
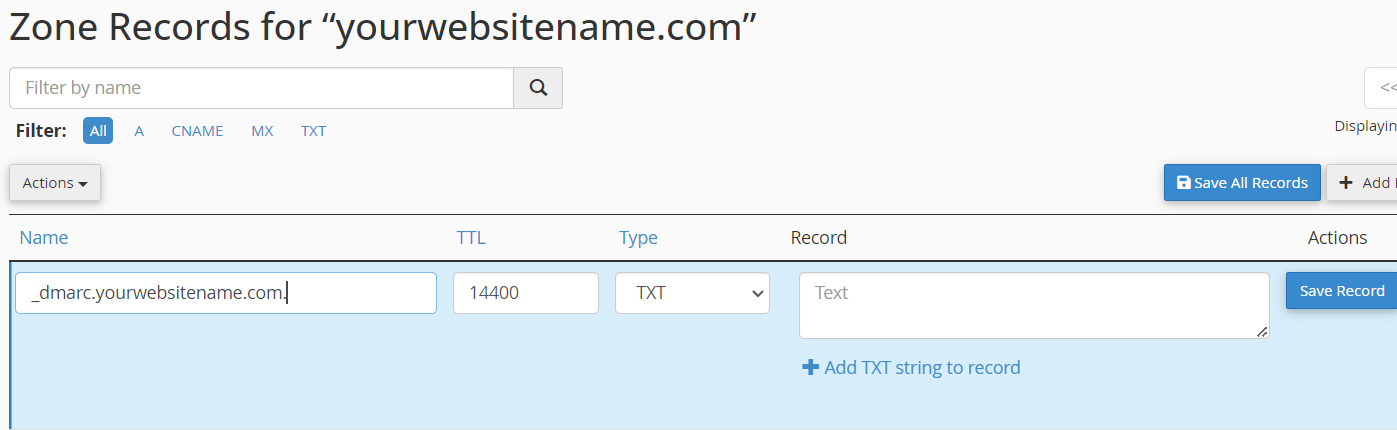
7. In the 'Record' column, you'll add the DMARC record. A basic DMARC record might look like: "v=DMARC1; p=none; rua=mailto:your@email.com"
v=DMARC1: Indicates the version of DMARC.
p=none: Specifies the policy for dealing with non-aligned emails. In this example, it's set to 'none,' meaning no specific action is taken.
rua=mailto:your@email.com: Specifies the email address to receive aggregate reports.
8. Click 'Save' or 'Add Record' to save the DMARC record.