How to Install WordPress on CloudPanel
For non-WHM based dedicated servers
Marc
Last Update 5 months ago
1. First, log in to your CloudPanel.
2. Once you’ve successfully logged in, you’ll see your server's dashboard. Look for the 'Add Site' button to start creating your WordPress site.

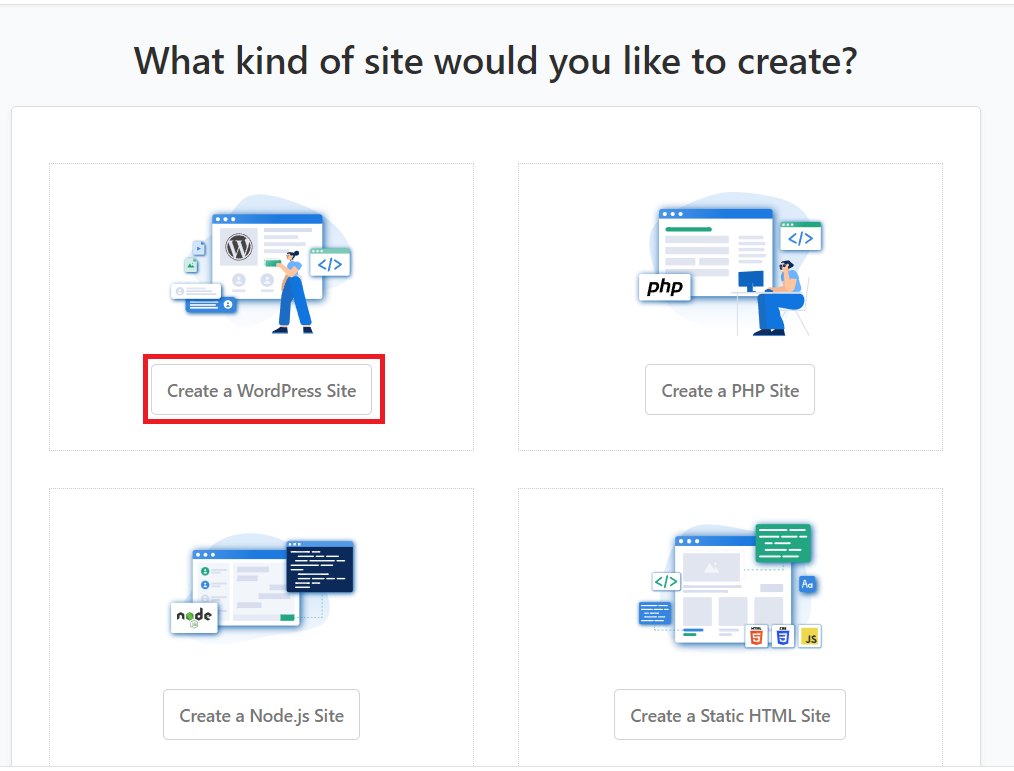
3. You will see a selection of site templates to choose from. Please click on 'Create a WordPress Site'.

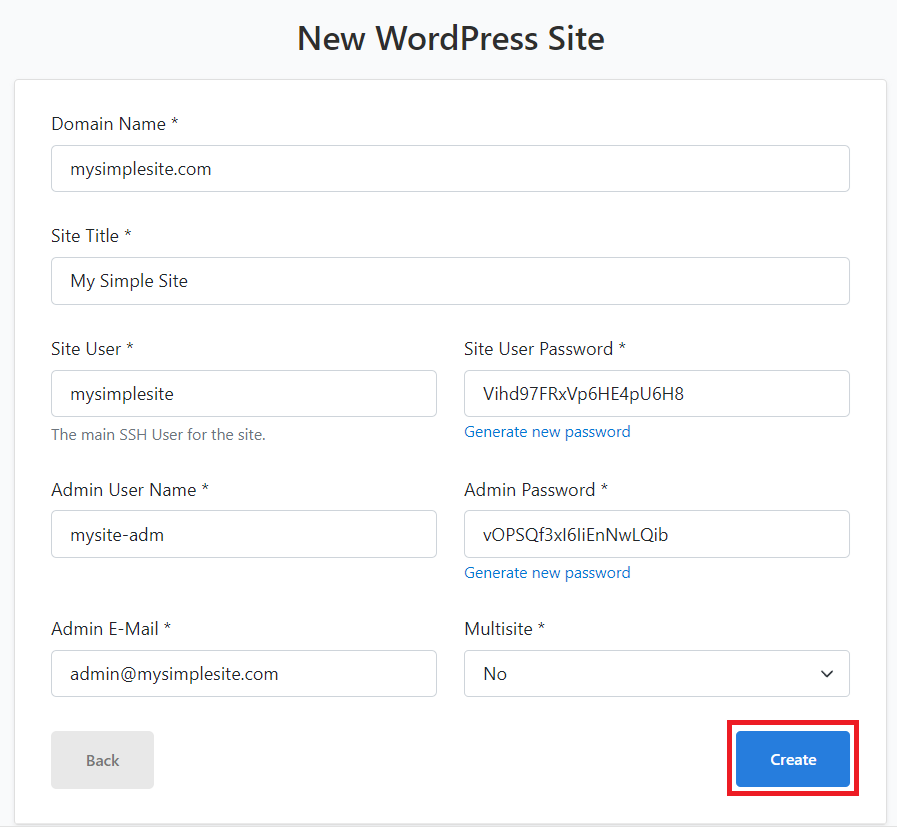
4. Fill in the basic details needed to create your WordPress site, and once you’re done, click 'Create.'

- Domain Name - The domain name is the web address people use to access your site, like "example.com." It's how visitors find you online, and it should be easy to remember and relevant to your content. You typically purchase a domain name from a domain registrar and if you don't have one yet you can purchase one when you click this link: Network Dynamics Domain Registration.
- Site Title - The WordPress site title is the name of your website that appears in the header and on search engines. It helps visitors identify your site and can be different from the URL.
- Site User - This will be your SSH user.
- Site User Password - Your SSH password for your SSH user.
- Admin User Name - Your WordPress site login username.
- Admin Password - Your WordPress site login password.
- Admin E-Mail - Your WordPress site user email.
- Multisite - Usually set 'No' to default, a sample use of WordPress Multisite could be a network of blogs for a university, where each department has its own site (e.g., "science.university.edu.au," "arts.university.edu.au") managed under one WordPress installation, allowing centralized control over themes, plugins, and user access.
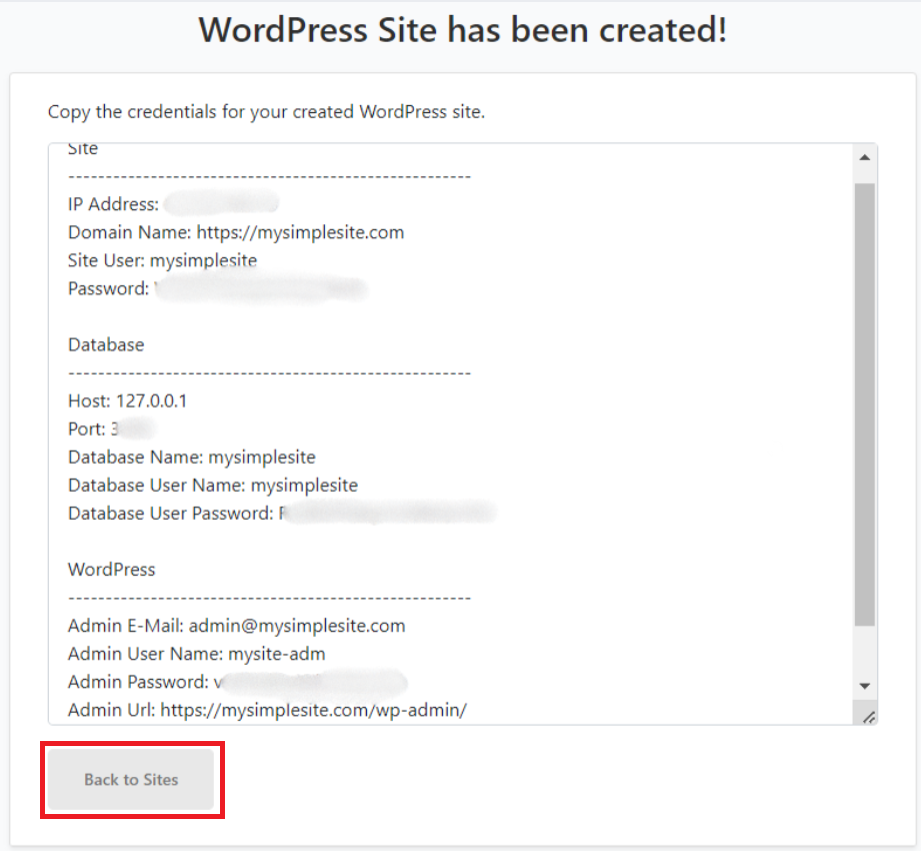
5. Once your site is created, you will see your WordPress site credentials. You can then log in to your WordPress site using the details provided in the WordPress section. Please copy and paste this into a text file or a secure location that only you or your administrator knows about. Once you're done, you can click the 'Back to Sites' button.

6. You will then be redirected to your site's dashboard, where you can start logging into your WordPress site using the Admin URL mentioned in step 5.
