Using Network Dynamics for a sub-domain only
Marc
Last Update 8 months ago
There are situations where you may only want to host your sub-domain with us and not your actual website. For example, you may have a website at www.example.com, but you want to host a WordPress blog with us at blog.example.com that is separate from the main site.
Creating subdomains with another WordPress installation is only available for Business Hosting and above. You can find more details about each shared hosting plan when you visit this page: https://networkdynamics.com/website-hosting/wordpress-hosting/ or https://networkdynamics.com/website-hosting/business-hosting/. The Network Dynamics Startup Plan and the Business Startup Plan is only available for an Alias domain or a single WordPress installation.
To do this, follow these steps:
1. Sign up for a hosting account as normal, using your actual domain name (ie. yourdomain.com.au).
2. Once the account has been setup and you’ve received the welcome email, log into cPanel.
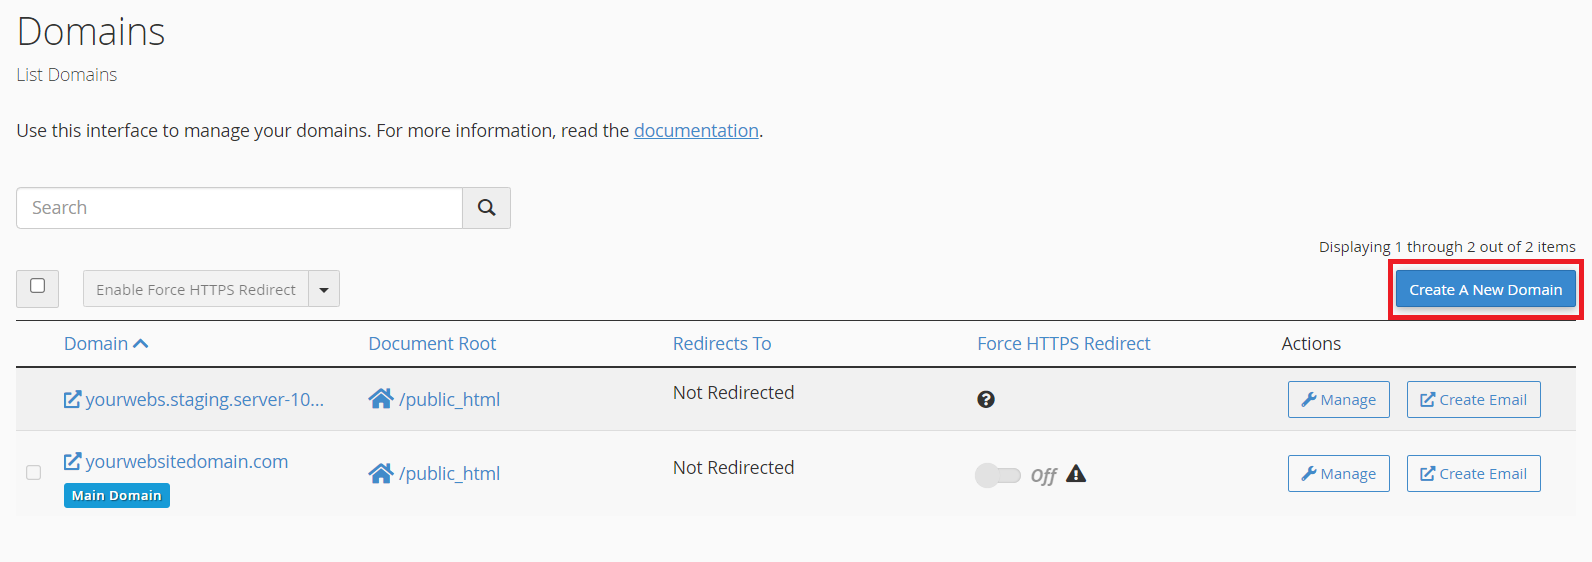
3. Once in cPanel, navigate to the 'Domains' section and click on the 'Domains' tool.

4. You will then be redirected to the Domains page. Kindly click on the 'Create a New Domain' button.

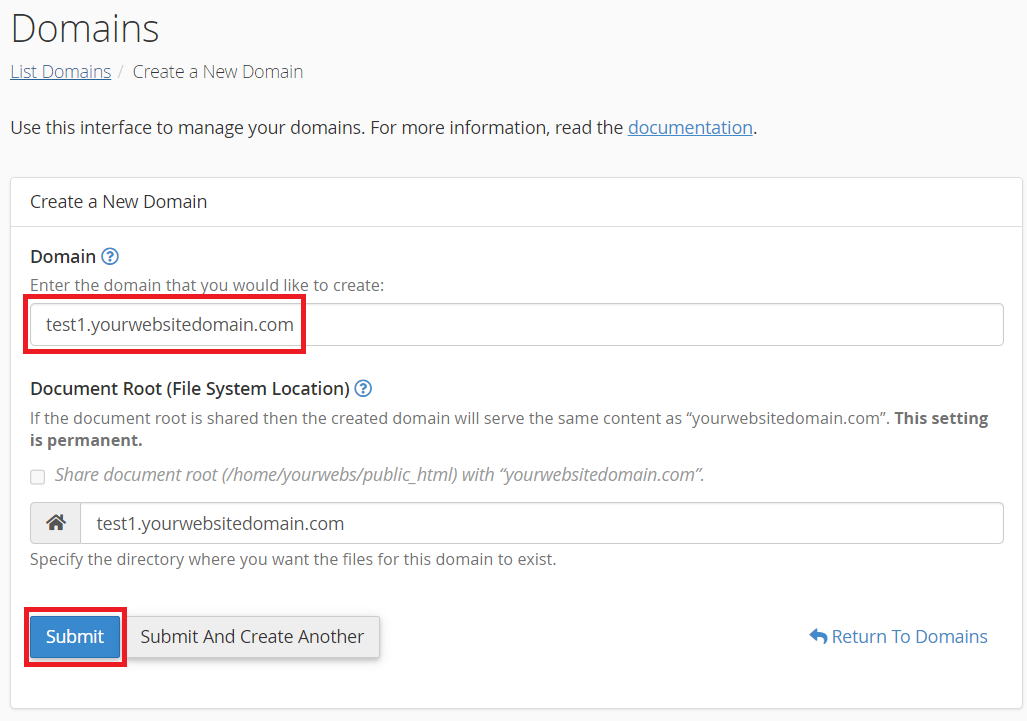
5. Once you are on the 'Create a New Domain' page, please enter your preferred subdomain in the domain input box. When you have finished, click the 'Submit' button to proceed with creating your subdomain.
Note: Make sure to uncheck the 'Share document root' option.

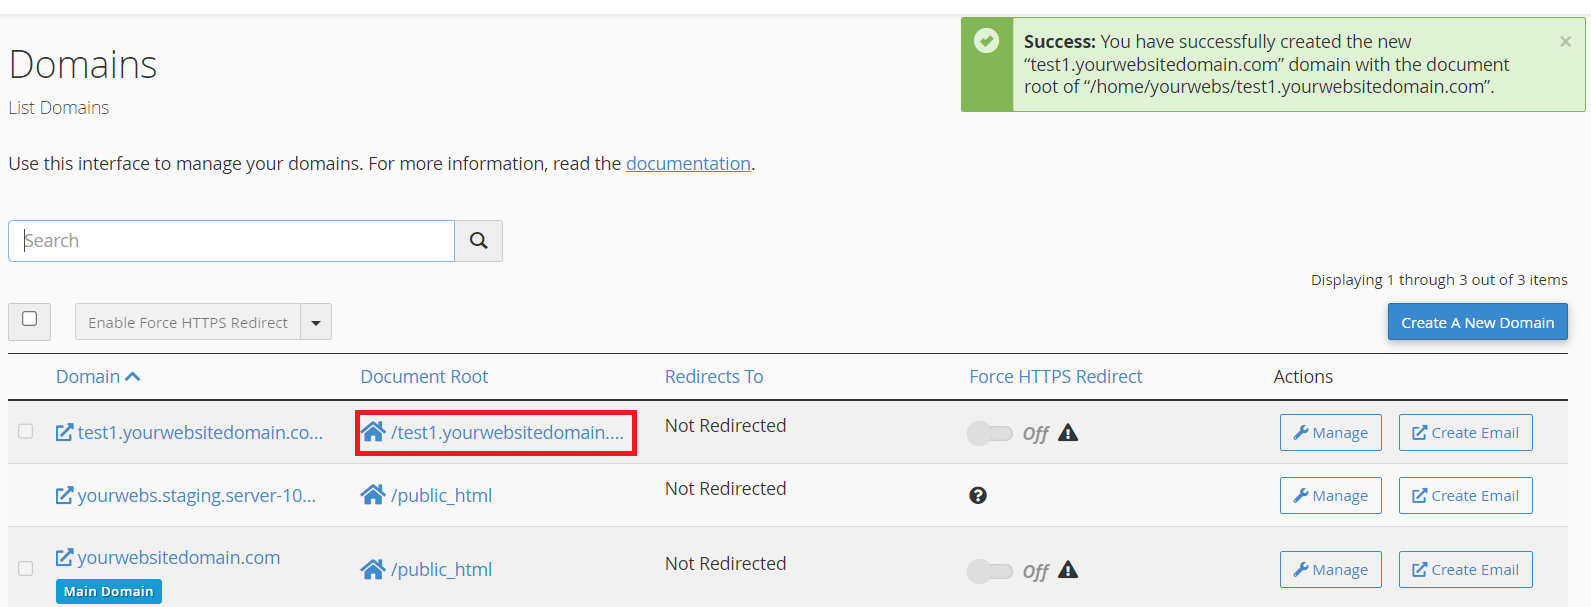
6. After your sub-domain is created, you will be redirected to the domains page. From there, you can click the link in the 'Document Root' column to access the file manager and begin uploading your site files. Alternatively, you can navigate to WP-Toolkit to start your WordPress instance or installation.

